Monday, June 28, 2010

Tau vs. Guard (League Match 3)


I had a terrific match with my Tau against a Guard army for the third round of our 1000 pt level of the escalation league. That was probably a run on sentence... oh well. Anyways. It was a really close game, but ultimately my opponent won the game in the last tense turns of the game. It was one of the best games of 40k I've played so far. I always find the close ones tend to be the best ones, no matter who takes it.

I played the 1000 pts league list posted a good while ago (of course).

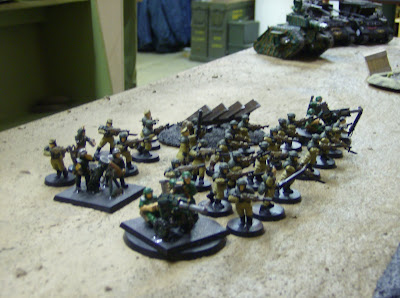
My opponent ran two guard squads on foot, some officers, a pair of Russ, a pair of Hydra flak tanks, and a Chimera withe melta vets.

Spearhead Deployment, Capture and Control. While I had greater mobility, the location+number of objectives took away some of that advantage. While I had better guns, he simply had more of them, meaning I couldn't sit back and outshoot him either. In the end I chose to put pressure on his scoring units, ignoring his Russ tanks for the duration of the game.

Deployment:
I chose to go first after winning a roll-off. I held my Kroot to outflank, deployed my Pathfinders in some ruins for cover, and used their scout move to get them to a window overlooking most of the field. My devilfish deployed so as to move up either side of a central ruin and harass his infantry out in the open, and the hammerhead deployed centre table, to redeploy quickly where needed. The suits were the hard choice. Ultimately I placed them centre, when I should have anchored a flank to give them a bit more cover to work with. My lone deathrain suit covered my weaker flank.

My opponent deployed fairly centre due to the danger of outflanking Kroot, and placed his tanks on his flanks.

Turn 1
My opponent forgot to seize the initative, I had already made my moves for my movement phase when he remembered. From now on I'll sportsmanlike remind my opponent. Turn 1's shooting was lacklustre on both sides. My Deathrain penetrated the Chimera sneaking up the flank, but I rolled a 1 on the table. The hammerhead and 'fish caused a few casualties on foot guard with markerlight support, but scatter reduced the potential of the railgun submunition. My opponents retaliation was better - his flak tanks got 4 penetrating hits on my Phirana, and the cover only saved 2 of them. One devilfish was immobilized It was wrecked. My opponent moved up my flank with his Chimera


The Kroot showed up and moved into some ruins near my opponent's objective. I dismounted the fire warriors from the immobilized fish and moved them into some ruins. My other fish and Hammerhead moved into better firing positions and cleared one guard squad out with markerlight support. My Fireknife squad barraged the Hydra squadron, destroying one and stunning the other, while taking cover in ruins. My opponents sentinels arrived from reserves on my flanks and took out my deathrain, but did little else. My Fireknife squad held their ground in their ruins despite battlecannon shots, and a Marbo satchel charge, but my dismounted firewarriors broke from concentrated fire and ran.

The Kroot continued their advance through the ruins, the wrecked Pirahna's drones stunned a sentinel, while my suits and tanks pounded foot guard, killing most of another squad, but failing to make them break. My fireknife squad began taking casualties, but stayed in the fight.

The pressure on my opponent's flank continued, my Kroot moved too far into the open and got pounded by mortars and artillery, causing them to break. My suits continued hammering his infantry, killing another bunch, while the hammerhead moved back a bit to deal with the incoming Chimera vets.

At the bottom of Turn 5 the battlefield looked pretty sparse. Burning hulls, scores of dead infantry, battlesuits thinned out, Kroot running off the table. It was great! All that was left to threaten was a Firewarrior squad mounted in a 'fish on my opponent's objective, being contested by a Hydra, while my opponent still had his Chimera vets. Dramatically, I had failed to destroy his Chimera with a railgun slug, rolling a 1, remarkably, his Chimera got stuck trying to drive through the crater left by a destroyed devilfish. Nailbiting! It was Turn 5, a draw thus far, but the roll was made and the game continued! The Hammerhead fired once more, killing many guard, but failing to make them break, they advanced onto the objective. The hammerhead was hit by a battlecannon in the side, failed it's disruption pod save, and was wrecked! With nothing left near enough to contest, it was the end of a game.

Overall - terrific game as you've gathered by now. I thoroughly enjoyed myself. It looked like I had it in hand for a good part of the game (at least from my point of view :D). I made some mistakes in the last few turns that cost me though! I should have recognized the danger of the Chimera sooner and moved units to support it sooner, likewise, I could have used drones and my Devilfish hull in a way to prevent having the objective I held from getting contested. Still, it was anyones game up to the very end, which makes for good Warhammer.

A few pictures!


Monday, June 21, 2010

The Black Legion Swells!

Yes, my chaos army has grown a bit. I finally got around to putting together my land raider and it's looking fairly sharp. I must say I didn't have much of a concept of just how BIG these things are. It makes my old 3rd ed predator look like a baby tank next to it. I've also put together a nice sized Chaos Terminator squad. I picked up a Chaos Terminator Lord box and a box of Chaos Termies. While those boxes give me 6 termies to work with, I was able to put together a solid 8 terminators by using the extra arms, heads and bits in conjunction with some of my loyalist terminators that are collecting dust. Slowly, my loyalist models are turning to the lure of Chaos! I have enough bits still to throw together another 1 or 2 termies yet. I'll post up pictures when I get my camera back.

I played a battle missions game today and tried the terminators out. They worked out well enough, but the mission type forced them to run without the terminator lord and weakened them somewhat. I feel that, overall, they'll perform better when I throw them in a Land Raider in a higher point game to get them into assault a bit more quickly.

In the realm of my main army, the Tau, I've put together my second hammerhead and built up another Crisis suit squad as well as a pair of broadsides. These additions will make their way into my army marching up to 1750 points. In the meantime, I've been busy trying to paint up the extra suits I'll need in the jump to 1250/1500. While I feel confident at getting what I need done for 1250 in time for the next step in our escalation league, I may have to substitute some stealth suits in place of the additional crisis suits I want. I'm still waiting for an order from GW, and it takes a while to paint these big guys. In the meantime, I do have stealth suits painted and ready to go, though I don't think they'll give my army what it needs at that level, I'm canny enough to make things work.

Playing another friendly game with my chaos tomorrow, but on Saturday my Tau are out for their third league matchup. Report with pictures should be up on Sunday or Monday.

Tuesday, June 8, 2010

Strategies

To keep things easy to check up on, I created another page for any useful tips or strategies that I have to offer. I moved my first post on this (from a few days ago) over there and will add to it as I go on. You can click on the links on the right hand page.

I am also considering moving my battle reports into there, to keep things a bit more organized.

Tourney Round 2!

Exciting match. Here's a battle report written by my worthy opponent. Enjoy:

The Tau deployed almost the entirety of his army in his corner. His Kroot infiltrated.
The Guard deployed a lone Chimera on the battlefield. The HQ inside the Chimera was frantic to relay instructions to the rest of the Guard army, which was outflanking.

Turn 1: The tau reach across the board and unleash upon the lone Chimera. The transport was shaken, unable to move or act. The tau closed, with the kroot circling from one side, and the Piranha coming in towards the Chimera from the other.

Scared witless by the incoming force, the HQ bailed from the Chimera and ran away, into nearby bushes, where they bunkered down.

Turn 2: The empty Chimera was destroyed. The kroot closed in on the cowering HQ. The rest of the tau force drifted towards the middle in preparation for the incoming Guard counter.

That force came. The Lone Commando, one Valk (with melta vets inside), one Chimera (with the Gunnery Sgt and plasma vets), and two autocannon Scout Sentinels appeared on the tau's short edge. Melta-vets deployed from the Valk and crippled a tau transport. A few Crisis-Suits were frazzled by autocannon shots. But the HQ sallied from their hiding spot, and charged the Pirhana that was previously hunting them, and detonated the lone craft. Also, the Lone Commando detonated his explosives pack, destroying the shield drones that accompanied the Crisis-Suits.

Turn 3: The tau addressed the ambushing Guard force. One Scout Sentinel was destroyed, the other badly wounded. The Hammerhead devestated the melta-vet squad. The Lone Commando was obliderated from concentrated fire. The Valk was stunned. The kroot stalking the Guard HQ pounced and slew the humans, taking only minimal losses. They would later consolidate onto the forested objective.

The second Valk appeared, and threw its second melta-vet squad at the tau Hammerhead, destroying it before flying off and doing minimal damage to some tau Fire Warriors. The other Valk (stunned) flew circles around the tau, confusing them with some high-speed passes.

Turn 4: The kroot stayed on the forested objective. The other tau stunned the Valks, and destroyed the second melta-vet squad.

The plasma-vets inside the Chimera ended up clearing the tau transport from the choke point, but taking casualities from the explosion. The Valks continued to do futuristic fly-bys.

Turn 5: The plasma-vets were obliterated. The remaining tau tried bringing down the remaining Sentinel and Valks down, but to no affect.
Currently, the Guard don't have any infantry left. The tau are holding three objectives - one with the kroot in the forest in the Guard's corner; one objective in the centre, held by Fire Warriors in a transport. And another objective held by a damaged, dismounted Fire Warrior unit in the tau's corner.

One Valk attempts to chase the kroot off the forested objective, with minimal result. However, concentrated fire from the remaining Chimera chases the Fire Warriors off the objective in the tau's corner. The second Valk attempts to hurt the tau gathered in the centre, to no effect.

Turn 6: The tau consolidate in the centre, attempting to block Guard forces from contesting the objective with their positioning. They frazzle the Valks, even managed to destroy a weapon's pod, but otherwise leave them unharmed.

One Valk looms over the kroot on the forested objective, contesting it. The second Valk manages to steal between several tau units from an unexpected angle, contesting the centre objective. The tau that held the objective in the tau's corner are wisely retreating.

The game ends in a draw. A pyyric draw.

Wednesday, June 2, 2010

Weekly games roundup.


Hello there, I've played a few games of late and I figured I'd give a brief update.
My group had our regular monthly meet, and it was a blast!
I had my first match of our 1000 pt level of our escalation tourney against a pretty tough nut to crack in the form of Orion's scout marine army. It was an annihilation mission and he had all of 4 kill points to give up compared to my 15, so I had to basically wipe out his army. He had 2 10 man scout squads and a 10 man terminator squad! That's right, 10 terminators! My army proved up to the task though and was able to clear the table. It was very near to a draw though by the last turn. My new list is running like a well oiled machine and the extra mobility and killing power of the Crisis suits is really working out. We'll see how I do against the guard in my next matchup. Battle report with pictures soon.

Played another game with my Chaos today, this time at the 1250 point level. I basically took the list from my last matchup and tweaked it. Here's how it looked.

Chaos Lord, Wings, Mark of Slaneesh, Daemon Weapon

Troops

10x Chaos Marines, 2x melta gun, Icon of Chaos ...whatever, the cheap one
- Rhino, Twin Linked Bolter

8x Khorne Beserkers /w skull champ and power fist
- Rhino, Extra Armour, twin linked bolter

6x Lesser Demons
6x Lesser Demons

Fast attack
5x Raptors /w champion and power sword. Icon of Slaneesh

Heavy Support
Pred /w lascannon sponsons
1x Obliterator
1x Obliterator

The lord rolled with the raptors.

We played the suprise attack scenario out of space marines section of the battle missions book.

It went well for me. I was the defender and deployed, well, defensively. My raptors and oblits took cover in the middle of the board, while my rhino mounted squads covered each side of the board. The predator deployed in a position with good fire lanes and cover for its rear armour.

Everything went according to my plan, I left the Khorne Rhino in a position to be hit by my opponent's assault marines, it was cracked open leaving the 'zerkers in a position to counter-assault the next turn. The raptors preyed on small combat squads and chopped them up, the Lord's daemon weapon rebelled once, but for the rest of the game it was dealing deadly bliss. I put the squad in there to be some fast moving anti-tank, and to deal with straggler depleted squads and it did just that, it handled small squads handily. Other than that, not much to report. Everything unfolded as I wanted and I manage to wipe out the other army. Though the army has worked well so far, I'm not sure it would fare well against a shooty army or lots of bodies. Hard to say, I think I'd need some flamers or a battle cannon in there to be a bit more threatening in that regard.